Claiming Your Git Identity with Commit Signatures
Overview
Do you know how easy it is for someone to pretend to be you when committing code using Git?

I created both of these commits with some minor editing of the .gitconfig file. Since I used the name and email of a friend of mine, thanks  Matt Eland, GitHub happily shows his picture and username, giving the appearance that he authored the commit. He did not.
You should also notice the Verified tag next to my real commit. It says:
Brad created this commit and signed it with an OpenPGP signing key that only he controls. The email address on the signing key matches the one on this commit, it also matches an email address associated with his GitHub account, and matches the public key information also associated with his account.
This is accomplished through GitHub’s commit signature verification process; which uses Git’s ability to sign your work to “verify that commits are actually from a trusted source.”
If none of that makes any sense, don’t worry; keep reading. The aim of this post is to distill my many Internet searches, reading of blogs and documentation pages, and experimentation with various key configurations into a well-explained step-by-step guide on how you too can use commit signatures to claim your Git identity.
Terminology
Let’s start by explaining the key terms.
| Term | Explanation |
|---|---|
| OpenPGP | OpenPGP is the encryption standard used when signing commits. |
| GNU Privacy Guard (GnuPG or GPG)1 | The software tool using OpenPGP to perform the actual signing. |
| Digital Signature | A type of electronic signature that can be used to authenticate the person who signed a document. A “virtual fingerprint”, and once a commit is signed with it, it becomes an embedded part of the commit.2 |
| Private (Secret) Key | The secret half of a keypair. It is used to sign commits. Should NEVER be shared. |
| Public Key | The non-secret half of a keypair. Others use it to verify the signature of the commit. Should be shared freely. |
| Keypair | The combination of a private and a public key. |
| Certification Keypair | The keys responsible for managing all other keys belonging to that identity. |
| Signing Subkey | The keys responsible for signing commits. |
A little more on keypairs. A keypair consists of both private and public keys and are always generated together. They be used to create other keys, for encrypting data, or for signing data. A single keypair can perform one or more of those function, depending on the abilities it was granted at creation.
GnuPG uses public-key cryptography so that users may communicate securely. In a public-key system, each user has a pair of keys [keypair] consisting of a private key and a public key. A user’s private key is kept secret; it need never be revealed. The public key may be given to anyone with whom the user wants to communicate. GnuPG uses a somewhat more sophisticated scheme in which a user has a primary keypair and then zero or more additional subordinate keypairs.
– “Getting Started.” The GNU Privacy Handbook, 1999.
Environment Setup
Tool Installation
As I use Windows for my primary development machine, all of these instructions assume Windows and PowerShell 7+.
The two necessary tools are gpg and git. You can download git from https://git-scm.com/.
The Windows installer for gpg is a bit harder to find. Use the most recent installer from their FTP site.
If you’re using alternative installation tools like Scoop or Chocolatey, the tools can be installed with these commands:
Scoop
scoop install git
scoop bucket add nonportable
scoop install gpg-np
Chocolatey
choco install git
choco install gnupg
At the time of this writing, the current version of Git is 2.42.0 and GnuPG (gpg) is 2.4.3. Verify the tools are installed correctly.
git --version
gpg --version
Configuration
There’s some minimum configuration necessary in git before we get started; your name, email, and the location of gpg.exe.
Let’s confirm that now.
git config --global user.name
git config --global user.email
If these commands return nothing, we need to give them values. The email here must also be used when creating the keys.
git config --global user.name "First Last"
git config --global user.email "email@example.com"
Since we’re using an externally installed version of gpg, we need to tell git to use the version we installed. Depending on the install method, that location may vary. You can use where to find the path.
where.exe gpg
C:\Program Files (x86)\gnupg\bin\gpg.exe
git config --global gpg.program "C:\Program Files (x86)\gnupg\bin\gpg.exe"
git will now use the correct version of gpg for all operations.
Separate GPG Home Directories
We will be creating two keypairs, a “certification” pair and a “signing” keypair, which will technically be a “subkey” of the certification keypair. The certification keypair is used to create and manage other keys, like the signing keypair. In normal daily usage, Git only needs to be aware of your signing keypair.
It’s considered best practice to keep your certification keypair in an isolated, highly secure, and separate environment from where you will do your daily work. This is especially true if your daily driver is a laptop and can be stolen easier than a desktop. The particularly security conscious readers might suggest using a completely separate machine or an air-gapped virtual machine, or other more highly secure method to keep the certification keypair separated from our normal workflow. For the purposes of this article, we will be mimicking a separate environment by using two separate GNUPGHOME directories on a single machine, one for key management and the other for normal usage.
By default, gpg stores data in %AppData%\gnupg. Set the GNUPGHOME environment variable or use the --homedir option to use a different directory.
I normally set the GNUPGHOME variable to %UserProfile%\.gnupg so that PowerShell and Git Bash will share the same directory.
The Scenario
For the purposes of this exercise I’ll be using Brad Knowles as my name and personal@example.com for my email. This will serve as my digital identity. Your identity is tied to the certification keypair and any subkeys created from it. If you need multiple identities, say one for personal use and another for work, you would create two sets of certification keypairs and signing keypairs3.
First we will create the certification keypair, then the signing keypair, all within the “certification” directory. Then we’ll export the signing keypair to a file so it can be imported into our “normal” directory. Finally, we’ll export the public half of the signing keypair. This key will be uploaded to GitHub and published externally so others can verify your commits locally.
It sounds like a lot, but it’s really not. Ready? Let’s go!
Generate Certification Key
Certification keys are generated in the “certification environment” I described above. Let’s the set GNUPGHOME for the certification environment. This can be any directory you prefer, just remember which directory you chose.
$env:GNUPGHOME="$env:UserProfile\.gnugp-cert"
gpg --version
| |
The highlighted row shows where the GNUPGHOME directory resides.
Everything is installed, configured properly, and we’re in the certification environment. Let’s start creating keys!
gpg --expert --full-generate-key
We use expert and full-generate-key flags to show all the available key creation options.
Choosing Key and Hash Type
Gpg responds with this list of key options:
gpg (GnuPG) 2.4.3; Copyright (C) 2023 g10 Code GmbH
This is free software: you are free to change and redistribute it.
There is NO WARRANTY, to the extent permitted by law.

Please select what kind of key you want:
   (1) RSA and RSA
   (2) DSA and Elgamal
   (3) DSA (sign only)
   (4) RSA (sign only)
   (7) DSA (set your own capabilities)
   (8) RSA (set your own capabilities)
   (9) ECC (sign and encrypt) *default*
  (10) ECC (sign only)
  (11) ECC (set your own capabilities)
  (13) Existing key
  (14) Existing key from card
Your selection?
Git itself isn’t really concerned with the option you choose, but GitHub only supports these key types 4:
- RSA
- ElGamal
- DSA
- ECDH
- ECDSA
- EdDSA
The GitHub documentation demonstrates creating keys using RSA and 4096 bits. I’m opting for a more secure 5 key and choosing EdDSA, which corresponds to option (11) ECC (set your own capabilities).
We’re choosing 11 because we want to customize what actions our key can perform.
Type 11 and press Enter.
Possible actions for this ECC key: Sign Certify Authenticate
Current allowed actions: Sign Certify

   (S) Toggle the sign capability
   (A) Toggle the authenticate capability
   (Q) Finished

Your selection?
Notice the Current allowed actions: for the key are Sign and Certify. Since we want this key to used for certification only, enter S to toggle OFF the Sign action.
Possible actions for this ECC key: Sign Certify Authenticate
Current allowed actions: Certify

   (S) Toggle the sign capability
   (A) Toggle the authenticate capability
   (Q) Finished

Your selection?
Now the Current allowed actions: line only has Certify listed. Enter Q to goto the next step.
Gpg presents the choices of elliptic curve to use:
Please select which elliptic curve you want:
   (1) Curve 25519 *default*
   (2) Curve 448
   (3) NIST P-256
   (4) NIST P-384
   (5) NIST P-521
   (6) Brainpool P-256
   (7) Brainpool P-384
   (8) Brainpool P-512
   (9) secp256k1
Your selection?
Curve 255196 is good7 enough5 for our purposes. Enter 1.
Setting Key Expiration
Do you want the key to expire?
Please specify how long the key should be valid.
         0 = key does not expire
      <n>  = key expires in n days
      <n>w = key expires in n weeks
      <n>m = key expires in n months
      <n>y = key expires in n years
Key is valid for? (0)
Do you want the key to expire? There are some conflicting, opinions, and another opinion on whether expiration dates provide any greater level of security.
I’m choosing to NOT use an expiration date on my certification key, but will use one on the signing subkey. Feel free to choose differently here.
Establishing Identity
Next you will be prompted for your name, email, and a optional comment.
git and a verified email present in your GitHub account.GnuPG needs to construct a user ID to identify your key.
Real name: Brad Knowles
Email: personal@example.com
Comment:
Gpg asks to confirm your selections with the option to change the values one last time before creating the key.
You selected this USER-ID:
    "Brad Knowles <personal@example.com>"

Change (N)ame, (C)omment, (E)mail or (O)kay/(Q)uit?
Change as necessary, once everything looks OK, enter O and press Enter.
You will be presented with a dialog to enter a passphrase.
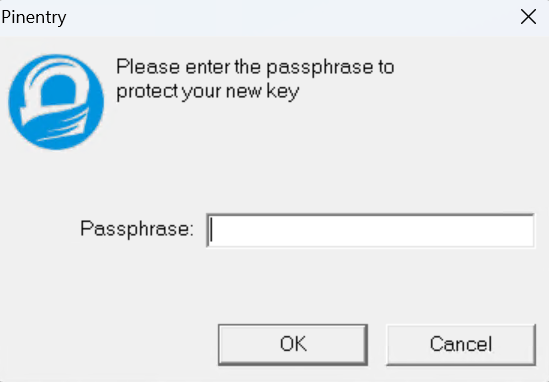
Use a passphrase to protect your key. Then put the passphrase into a password manager. If your key is stolen this will be the only protection you have against bad people using it.
Yes, you will have to enter it every time you make a commit, but it’s easy to copy and paste from your password manager.
The newly created key will be displayed.
gpg: directory 'C:\\Users\\Brad\\.gnupg-cert\\openpgp-revocs.d' created
gpg: revocation certificate stored as 'C:\\Users\\Brad\\.gnupg-cert\\openpgp-revocs.d\\3DF0BC8B128E675BF40A7701209715C6642286C4.rev'
public and secret key created and signed.

pub   ed25519 2023-07-01 [C]
      3DF0BC8B128E675BF40A7701209715C6642286C4
uid                      Brad Knowles <personal@example.com>
We’ll describe the output after we create the signing key.
Generate Signing Subkey
To add a subkey, we edit the certification key.
gpg --expert --edit-key "personal@example.com"
gpg (GnuPG) 2.4.3; Copyright (C) 2023 g10 Code GmbH
This is free software: you are free to change and redistribute it.
There is NO WARRANTY, to the extent permitted by law.

Secret key is available.

sec  ed25519/209715C6642286C4
     created: 2023-07-01  expires: never       usage: C
     trust: ultimate      validity: ultimate
[ultimate] (1). Brad Knowles <personal@example.com>
gpg> addkey
Choosing Key and Hash Type
There is a prebuilt option for creating signing key, so we’ll choose 10.
Please select what kind of key you want:
   (3) DSA (sign only)
   (4) RSA (sign only)
   (5) Elgamal (encrypt only)
   (6) RSA (encrypt only)
   (7) DSA (set your own capabilities)
   (8) RSA (set your own capabilities)
  (10) ECC (sign only)
  (11) ECC (set your own capabilities)
  (12) ECC (encrypt only)
  (13) Existing key
  (14) Existing key from card
Your selection?
Please select which elliptic curve you want:
   (1) Curve 25519 *default*
   (2) Curve 448
   (3) NIST P-256
   (4) NIST P-384
   (5) NIST P-521
   (6) Brainpool P-256
   (7) Brainpool P-384
   (8) Brainpool P-512
   (9) secp256k1
Your selection?
As we did for the certification key, we’ll select Curve 25519, option 1.
Setting Key Expiration
As I mentioned previously, I’m setting an expiration date on my signing subkey. Git will not use an expired key to sign commits. So if your key falls into the wrong hands, it will only work till the expiration date. While an expiration date is not a complete security measure, it can limit misuse. Ultimately, protecting the certification key and using passphrases are the real security protections.
Expiration dates are easily changed with the certification key. When the key expires, update the date and republish the keys.
Please specify how long the key should be valid.
         0 = key does not expire
      <n>  = key expires in n days
      <n>w = key expires in n weeks
      <n>m = key expires in n months
      <n>y = key expires in n years
Key is valid for? (0)
I want my subkey to expire every 2 years, so I typed 2y. Choose what makes the most sense for you.
Key expires at 6/30/2025 7:16:50 PM Eastern Daylight Time
Is this correct? (y/N) y
Really create? (y/N) y
We need to generate a lot of random bytes. It is a good idea to perform
some other action (type on the keyboard, move the mouse, utilize the
disks) during the prime generation; this gives the random number
generator a better chance to gain enough entropy.
You will be prompted for the passphrase you entered for the certification key.
The signing subkey to be created will be displayed.
sec  ed25519/209715C6642286C4
     created: 2023-07-01  expires: never       usage: C
     trust: ultimate      validity: ultimate
ssb  ed25519/665CECFAD715DD26
     created: 2023-07-01  expires: 2025-06-30  usage: S
[ultimate] (1). Brad Knowles <personal@example.com>

gpg>
Save the Key
Since we’re adding a subkey to the certification key we have the extra step of saving our edits.
Enter save at the gpg> prompt and the subkey is created.
Examining the Keyring
Now that we have our keys, let’s list them and go over the output. We’re adding some flags to --list-keys to display more information.
Public Keys
gpg --list-keys --keyid-format long --with-fingerprint --with-subkey-fingerprint "personal@example.com"
pub   ed25519/209715C6642286C4 2023-07-01 [C]
      Key fingerprint = 3DF0 BC8B 128E 675B F40A  7701 2097 15C6 6422 86C4
uid                 [ultimate] Brad Knowles <personal@example.com>
sub   ed25519/665CECFAD715DD26 2023-07-01 [S] [expires: 2025-06-30]
      Key fingerprint = 2AA4 2721 506A 9A98 96E6  DB17 665C ECFA D715 DD26
The first record line is: pub ed25519/209715C6642286C4 2023-07-01 [C]
| Field | Description |
|---|---|
| pub | The type of record, public key |
| ed25519 8 | Key Algorithm |
| 209715C6642286C4 | Key ID, the 64 bit keyid as specified by OpenPGP |
| 2023-07-01 | Creation Date |
| [C] | The capabilities of the key, certification |
The next line Key fingerprint = 3DF0 BC8B 128E 675B F40A 7701 2097 15C6 6422 86C4 is the key’s fingerprint
A new record, uid starts the next line uid [ultimate] Brad Knowles <personal@example.com>.
| Field | Description |
|---|---|
| uid | The type of record, user id |
| [ultimate] | Describes the level of trust the key has on this system. Ultimate is only ever for your own keys. |
| Brad Knowles <personal@example.com> | Name, email, and comment associated with the user id. |
The next line describes the subkey information, sub ed25519/665CECFAD715DD26 2023-07-01 [S] [expires: 2025-06-30]
| Field | Description |
|---|---|
| sub | The type of record, subkey |
| ed25519 | Key Algorithm |
| 665CECFAD715DD26 | KeyID, the 64 bit keyid as specified by OpenPGP |
| 2023-07-01 | Creation Date |
| [S] | The capabilities of the key, signing |
| [expires: 2025-06-30] | Expiration Date |
The last line Key fingerprint = 2AA4 2721 506A 9A98 96E6 DB17 665C ECFA D715 DD26 is the subkey’s fingerprint
Full details of the fields are available in the GnuPG Details documentation.
Secret Keys
Now, let’s look at the secret keys.
gpg --list-secret-keys --keyid-format long --with-fingerprint --with-subkey-fingerprint "personal@example.com"
This command is the same as the previous one, with the exception of --list-secret-keys. This will list the keys from the secret keyring.
It also has the same output as --list-keys with exception of the first line.
sec   ed25519/209715C6642286C4 2023-07-01 [C]
      Key fingerprint = 3DF0 BC8B 128E 675B F40A  7701 2097 15C6 6422 86C4
uid                 [ultimate] Brad Knowles <personal@example.com>
ssb   ed25519/665CECFAD715DD26 2023-07-01 [S] [expires: 2025-06-30]
      Key fingerprint = 2AA4 2721 506A 9A98 96E6  DB17 665C ECFA D715 DD26
The previous key type was pub now it is sec, which, not surprisingly stands for secret key.
Exporting Keys
Since our signing subkey is the only one we want in our “normal” environment, we export it and not the certification key. We need both the secret subkey and the public subkey so we export and save them with two separate commands.
gpg --armor --output "personal-example.com.665CECFAD715DD26.sign.pub.gpg-key.asc" --export 665CECFAD715DD26!
gpg --armor --output "personal-example.com.665CECFAD715DD26.sign.sec.gpg-key.asc" --export-secret-subkeys 665CECFAD715DD26!
Notice the ! suffix at the end of the keyid.
The official wording is “an exclamation mark (!) may be appended to force using the specified primary or secondary key and not to try and calculate which primary or secondary key to use.”
I believe this only matters if there are multiple subkeys for a given certification (primary) key. It’s a good habit though to force gpg to be explicit in its actions whenever possible.
The secret subkey will be imported to our normal environment; while the public one will be uploaded to GitHub and published publicly so others can verify your commits.
Importing into Working Keyring
We’ll be switching to our normal environment now. We need to securely transport the secret key from the certification environment. In this contrived setup, it’s not a concern, but keep this mind as you move your keys to different machines. DO NOT USE EMAIL 🙂
First, let’s switch to our normal environment:
$env:GNUPGHOME="$env:UserProfile\.gnugp"
Import the key with the following command. You will be prompted for the passphrase.
gpg --import "personal-example.com.665CECFAD715DD26.sign.sec.gpg-key.asc"
gpg: key 209715C6642286C4: public key "Brad Knowles <personal@example.com>" imported
gpg: To migrate 'secring.gpg', with each smartcard, run: gpg --card-status
gpg: key 209715C6642286C4: secret key imported
gpg: Total number processed: 1
gpg:               imported: 1
gpg:       secret keys read: 1
gpg:   secret keys imported: 1
Let’s look at the keys.
gpg --list-keys
pub   ed25519 2023-07-01 [C]
      3DF0BC8B128E675BF40A7701209715C6642286C4
uid           [ unknown] Brad Knowles <personal@example.com>
sub   ed25519 2023-07-01 [S] [expires: 2025-06-30]
gpg --list-secret-keys
sec#  ed25519 2023-07-01 [C]
      3DF0BC8B128E675BF40A7701209715C6642286C4
uid           [ unknown] Brad Knowles <personal@example.com>
ssb   ed25519 2023-07-01 [S] [expires: 2025-06-30]
Two things to notice:
- The secret key record type,
sechas a modifier of#. - The trust type on both keys is
unknown.
The # modifier has special meaning. According to the gpg man page of the --list-secret-keys command.
List the specified secret keys. If no keys are specified, then all known secret keys are listed.
A
#after the initial tagssecorssbmeans that the secret key or subkey is currently not usable. We also say that this key has been taken offline (for example, a primary key can be taken offline by exporting the key using the command--export-secret-subkeys). A>after these tags indicate that the key is stored on a smartcard. See also--list-keys.
This is what we want to see. The secret certification key is unusable, because we didn’t export it from the certification environment. This means that if this environment is compromised our secret certification key is still safe.
Setting Key Trust
We want this keypair to be fully trusted, since we own it.
gpg --expert --edit-key "personal@example.com"
gpg (GnuPG) 2.4.3; Copyright (C) 2023 g10 Code GmbH
This is free software: you are free to change and redistribute it.
There is NO WARRANTY, to the extent permitted by law.

Secret subkeys are available.

pub  ed25519/209715C6642286C4
     created: 2023-07-01  expires: never       usage: C
     trust: unknown       validity: unknown
ssb  ed25519/665CECFAD715DD26
     created: 2023-07-01  expires: 2025-06-30  usage: S
[ unknown] (1). Brad Knowles <personal@example.com>

gpg>
Enter trust at the gpg> prompt.
pub  ed25519/209715C6642286C4
     created: 2023-07-01  expires: never       usage: C
     trust: unknown       validity: unknown
ssb  ed25519/665CECFAD715DD26
     created: 2023-07-01  expires: 2025-06-30  usage: S
[ unknown] (1). Brad Knowles <personal@example.com>

Please decide how far you trust this user to correctly verify other users' keys
(by looking at passports, checking fingerprints from different sources, etc.)

  1 = I don't know or won't say
  2 = I do NOT trust
  3 = I trust marginally
  4 = I trust fully
  5 = I trust ultimately
  m = back to the main menu

Your decision?
Since this is our own key, we can trust it ultimately. Enter 5, confirm with y, then type quit to exit gpg.
More information about trust levels and the importance of trust can be found at What is Ownertrust? Trust-levels explained and the section Validating other keys on your public keyring from The GNU Privacy Handbook.
Configuring Git and Gpg
Signing Subkey
Now that we have a trusted signing keypair, we need to tell git to use this key when signing commits.
List the secret keys to get the key id, 665CECFAD715DD26, of the signing subkey.
gpg --list-secret-keys --keyid-format long --with-fingerprint --with-subkey-fingerprint
sec   ed25519/209715C6642286C4 2023-07-01 [C]
      Key fingerprint = 3DF0 BC8B 128E 675B F40A  7701 2097 15C6 6422 86C4
uid                 [ultimate] Brad Knowles <personal@example.com>
ssb   ed25519/665CECFAD715DD26 2023-07-01 [S] [expires: 2025-06-30]
      Key fingerprint = 2AA4 2721 506A 9A98 96E6  DB17 665C ECFA D715 DD26
Use the user.signingKey configuration property to tell git about our key. Don’t forget the exclamation point !.
git config --global user.signingKey 665CECFAD715DD26!
This tells git to use this signing subkey for every repo on the machine. If there are some instances where you want a specific repository to use a different key, navigate to a directory within the repository and use the config command again, but with the --local flag.
git config --local user.signingKey <other keyid>!
Signing Commits
We’ve told git where to find gpg and the signing key to use, but haven’t told it to sign any commits.
git config --global commit.gpgSign true
Git will now attempt to sign every commit on every repository. If you need to exclude some repositories from being signed, set the commit.gpgSign value to false for that repository using the --local flag.
git config --local commit.gpgSign false
Alternatively, if you only need a few repositories to use sign commits, forgo the global setting and set commit.gpgSign to true only in those repositories.
git conditionally using [includeIf] syntax. While beyond the scope of this article, you can learn more in the Set signing key conditionally section of the Gpg Signed Commits documentation.When you make a commit you’ll be prompted for your passphrase. Once entered the commit finishes as normal.
Hooray!! 🎉 You’ve signed your first commit!
Verifying Signed Commits
Now that we are signing commits, how do we see the signatures when running git log? How do we verify commits from other contributors are signed (or not)? We use the --show-signature option of git log.
Locally
git log --show-signature
commit 1065155f5b2803883e2610b584c61ecee5933c93 (HEAD -> main, origin/main)
gpg: Signature made 7/2/2023 6:48:45 PM Eastern Daylight Time^M
gpg:                using EDDSA key 2AA42721506A9A9896E6DB17665CECFAD715DD26^M
gpg: Good signature from "Brad Knowles <personal@example.com>" [ultimate]^M
Primary key fingerprint: 3DF0 BC8B 128E 675B F40A  7701 2097 15C6 6422 86C4^M
     Subkey fingerprint: 2AA4 2721 506A 9A98 96E6  DB17 665C ECFA D715 DD26^M
Author: Brad Knowles <personal@example.com>
Date:   Sun Jul 2 18:48:45 2023 -0400

    Initial commit
Adding --show-signature to git log checks the validity of a signed commit object by passing the signature to gpg --verify and displays the output.
This works because gpg has the public part of your signing key in the public keyring. What would happen if another person made a signed commit and you ran this command again?
| |
Git would tell you “I see this commit is signed, but I can’t verify the signature because you don’t have this person’s public key.”
We solve this by importing their public key (which they need to have published somewhere that is publicly accessible). This is covered in the Importing Others’ Keys section.
GitHub
If you push this commit to GitHub, you’ll see a new tag on the commit, “Unverified.”

GitHub supports the concept of verified commits. GitHub will take the signature of a commit and attempt to validate it against the public GPG keys on your account that also match the email address of the commit. If they find a match, you’ll see a verified icon and if not, you’ll see the unverified icon.

We need to upload the public signing subkey to our GitHub account. Rather than repeating their docs, visit adding a GPG key to your GitHub account to walk through the process. You already exported the public key earlier, just open the text file in any editor and copy the key for uploading.
GitLab also supports verified commits. The steps are similar to GitHub and are available here.
Surprisingly, BitBucket and Azure DevOps do not support this. BitBucket is “working on it” and tracking the effort in JIRA ticket BCLOUD-3166. Azure DevOps is tracking interest with this user voice ticket.
Most people stop here and consider the process complete, but that’s not really true. So far, only GitHub can verify our commits, but other developers looking at the code locally cannot. They get the message we saw earlier gpg: Can't check signature: No public key.
To fix that, we must publish our keys to some publicly accessible place and the developer must import our key to their environment. Let’s do that now.
Publishing Public Keys
Key Servers
Traditionally, gpg keys are published are via key servers. A keyserver is a service that publishes public keys and makes them searchable. You can upload your public signing key to a keyserver so that other users can find it.
Some of the popular ones:
- https://keyserver.ubuntu.com/ (the current default of GnuPG)
- https://keys.openpgp.org/
- https://pgp.mit.edu/
Unfortunately there are some potential privacy concerns with keyservers. Spammers seem to be trolling keyservers to harvest emails. The MIT PGP Public Key Server has the situation listed as an issue on their FAQ.
I think spammers got my email address from the PGP key server. What can I do?
Yes, there have been reports of spammers harvesting addresses from PGP key servers. Unfortunately, there is not much that either we or you can do about this. Our best suggestion is you take advantage of any spam filtering technology offered by your ISP.
There’s also been an issue with key servers shutting down. This question, posted on superuser.com, Where to upload PGP public key? Are KeyServers still surviving? and sks-keyservers gone. What to use instead? from unixstackexchange.com show a long of history of sites closing and users suggesting alternatives.
I’m opting to not use a key server. I will be publishing through two different channels; my own website and with multiple git cloud hosting providers.
If you opt to use a key server, the keyserver site links above have instructions on submitting your keys.
Web Key Directory
I will be using Web Key Directory for my personal key. It uses the domain of the primary user ID (email) on the key to find they key on that domain at a well known endpoint.
If you own the domain of the email address on the key, you need to put the binary formatted key in the location https://domain.com/.well-known/openpgpkey/hu/<hashed value>
To get the hash value, add --with-wkd to --list-keys.
gpg --list-keys --with-wkd
pub   ed25519 2023-07-01 [C]
      3DF0BC8B128E675BF40A7701209715C6642286C4
uid           [ultimate] Brad Knowles <personal@example.com>
              5pw7sz7ipunrs4qpkrrzt131q98dwoen@example.com
sub   ed25519 2023-07-01 [S] [expires: 2025-06-30]
The highlighted line shows the WKD hash value.
We’ll export they key again, this time with different parameters than before.
gpg --export --output "5pw7sz7ipunrs4qpkrrzt131q98dwoen@example.com" 665CECFAD715DD26!
This exports the public key in binary format with the name 5pw7sz7ipunrs4qpkrrzt131q98dwoen@example.com.
We can put this file in our website so that it’s final url will be, https://www.example.com/.well-known/openpgpkey/hu/5pw7sz7ipunrs4qpkrrzt131q98dwoen@example.com
Obviously every website is different, so I can’t tell you best how to accomplish that, but once the file is available at that url, gpg will be able to import it.
Public Repo
WKD is great if you own the domain of your email. If you use a service like Gmail, or one of your identities is from your employer’s domain, WKD won’t really be an option for you.
In my opinion, the easiest way to host something without owning your own domain, is with a public GitHub repo. Export your key using gpg --export --armor, push it to a public GitHub repo. You can socialize the information on channels you control, Twitter, GitHub profile, your email signature.
You would want to socialize the raw content url. If people navigate to the URL or use a script to download your key, this will ensure they get the pure contents of the key and not GitHub’s hosted UI displaying the file.
Importing Others’ Keys
The process of importing someone’s key depends on how they published it. The best way to determine that is to see if they have documented the information in some public forum. Is it listed on their GitHub profile, social media platform, etc.? If so, follow those instructions and contact the person for assistance. Let’s walk through some common options.
Keyservers
If the key is on a keyserver, it’s best to use the key’s fingerprint as that will guarantee you import the correct key. You can search by name and/or email address with the --search-keys command. However, there is no validation of the identifying information.
Run this command and tell me which key is the right one for the sitting President of the United States? (Hint: None of them.)
gpg --search-keys president@whitehouse.gov
How do we get the fingerprint? If the person hasn’t documented their key information, you can find the key’s fingerprint in the git commit log. Find a commit that’s been signed by the person’s key.
git log --show-signature
commit <commit hash> (HEAD -> develop, origin/develop, origin/HEAD)
gpg: Signature made 6/27/2023 5:07:56 PM Eastern Daylight Time^M
gpg:                using EDDSA key 3DF0BC8B128E675BF40A7701209715C6642286C4^M
gpg: Can't check signature: No public key^M
Author: Brad Knowles <personal@example.com>
Date:   Tue Jun 27 20:59:55 2023 +0200

    Important commit message here
Search for they key by that fingerprint.
gpg --search-keys 3DF0BC8B128E675BF40A7701209715C6642286C4
If the key is found, we’ll see this message.
gpg: data source: https://162.213.33.8:443
(1)     Brad Knowles <personal@example.com>
          263 bit EDDSA key 3DF0BC8B128E675B, created: 2023-07-01
Keys 1-1 of 1 for "3DF0BC8B128E675B".  Enter number(s), N)ext, or Q)uit >
If you type 1 it will import the key. It may attempt to list more keys, if so, type Q to quit.
This is the message we’ll get if the key is not found.
gpg: data source: https://162.213.33.8:443
gpg: key "3DF0BC8B128E675BF40A7701209715C6642286C4" not found on keyserver
gpg: keyserver search failed: Not found
We could also use the –recv-keys command to download the key from the server.
gpg --recv-keys 3DF0BC8B128E675BF40A7701209715C6642286C4
You’ll likely get one of these responses:
Key found, importing
gpg: key 3DF0BC8B128E675B: public key "Brad Knowles <personal@example.com>" imported
gpg: Total number processed: 1
gpg:               imported: 1
or key not found
gpg: keyserver receive failed: No data
If the key is found, the next time you run git log --show-signature you should see that “Good signature” line.
commit 1065155f5b2803883e2610b584c61ecee5933c93 (HEAD -> main, origin/main)
gpg: Signature made 7/2/2023 6:48:45 PM Eastern Daylight Time^M
gpg:                using EDDSA key 2AA42721506A9A9896E6DB17665CECFAD715DD26^M
gpg: Good signature from "Brad Knowles <personal@example.com>" [ultimate]^M
Primary key fingerprint: 3DF0 BC8B 128E 675B F40A  7701 2097 15C6 6422 86C4^M
     Subkey fingerprint: 2AA4 2721 506A 9A98 96E6  DB17 665C ECFA D715 DD26^M
Author: Brad Knowles <personal@example.com>
Date:   Sun Jul 2 18:48:45 2023 -0400

    Initial commit
Web Key Directory
If the user has chosen not to use a keyserver, you can have gpg use the Web Key Directory protocol to find the key from the domain part of the email address associated with the key.
Gpg has this functionality built it, but it uses a different command
gpg --locate-external-key "personal@example.com"
# This exact command will not work as there are no keys @example.com
If the key was at the location we discussed in the earlier section on Web Key Directory, gpg will import it automatically.
gpg: key 3DF0BC8B128E675B: public key "Brad Knowles <personal@example.com>" imported
gpg: Total number processed: 1
gpg:               imported: 1
# ... key info ...
Public Repo
If the user has decided to skip the keyserver and WKD, the process is a bit more involved. First you must find their key. The user should make this information easily accessible to the general public. Social media is a common avenue, for example a pinned Tweet. Email signatures, blog footers, there’s even such a thing as an in-person key signing party (nerds know how to have a good time, don’t we 🙂); all of these are ways for a person to communicate they location of their key. If all else fails, reach out to the person over a communication channel you are sure they own and ask where to find their key.
Our friend has told us their key is at https://public-key.example.com/3DF0BC8B128E675B.asc. We need to download the key to the computer then import into the keyring.
One common way to get the file is to use cURL. You could download the file from the link manually as well, there shouldn’t be any problems with character encodings etc.
curl --location "https://public-key.example.com/3DF0BC8B128E675B.asc" --remote-name --remote-header-name

# This is the same command, just using the single parameter names
curl -LOJ "https://public-key.example.com/3DF0BC8B128E675B.asc"
This command downloads the file, following any redirects --location (-L) with a name specified from the server-specified Content-Disposition filename instead of extracting a filename from the URL, --remote-name (-O) --remote-header-name (-J).
You can also use pure PowerShell, but it’s more verbose.
$keyFileName = Invoke-WebRequest -Uri $url -Method HEAD | %{$_.Headers["Content-Disposition"].Split('=')[1].Trim('"')}
Invoke-WebRequest -Uri $url -OutFile $keyFileName
Now that you have the key, simply import it.
gpg --import .\3DF0BC8B128E675B.asc
gpg: key 3DF0BC8B128E675B: public key "Brad Knowles <personal@example.com>" imported
gpg: Total number processed: 1
gpg:               imported: 1
Summary
This has been a long post, but we’ve accomplished quite a bit. We learned just how easy it is to fake Git commit author information. We’ve discussed the basics of public key cryptography, the foundation of commit signing; established a key creation environment; created signing keys, configured git to use those keys to sign commits, uploaded the public key to GitHub for verification and publicly published our keys.
There are many more commands and options to gpg but we’ve gotten the basics down.
Go forth and sign all the commits!
Additional Reading
Creating the perfect GPG keypair - This is the blog that started it all for me and is referenced in many other places. It was created in 2013 however,
gpghas much better defaults and there are some easier ways to perform some of the actions; hence this article!
References
The post Claiming Your Git Identity with Commit Signatures first appeared on Brad Knowles' Blog.
GnuPG is a complete and free implementation of the OpenPGP standard as defined by RFC4880 (also known as PGP). GnuPG allows you to encrypt and sign your data and communications; it features a versatile key management system, along with access modules for all kinds of public key directories. GnuPG, also known as GPG, is a command line tool with features for easy integration with other applications.
– The GNU Privacy Guard, accessed 05 July 2023 ↩︎
Nadeem, M. Salman. “Digitally Signed Emails. What Is It And How Do Digital Signatures Work?” Mailfence Blog, 9 Feb. 2023, https://blog.mailfence.com/how-do-digital-signatures-work/. ↩︎
Erat, Jens. “Answer to ‘How Many OpenPGP Keys Should I Make?’” Information Security Stack Exchange, 29 Jan. 2013, https://security.stackexchange.com/a/29858. ↩︎
“Generating a New GPG Key.” GitHub Docs, https://docs.github.com/en/authentication/managing-commit-signature-verification/generating-a-new-gpg-key#supported-gpg-key-algorithms. Accessed 29 June 2023. ↩︎
Kontsevoy, Ev. “Comparing SSH Keys - RSA, DSA, ECDSA, or EdDSA?” Teleport Blog, 26 Aug. 2020, https://goteleport.com/blog/comparing-ssh-keys/. ↩︎ ↩︎
Wikipedia contributors. “Curve25519.” Wikipedia, The Free Encyclopedia, 26 June 2023. Wikipedia, The Free Encyclopedia, https://en.wikipedia.org/w/index.php?title=Curve25519&oldid=1161997981. ↩︎
Asfour, Omar. “ECDSA vs ECDH vs Ed25519 vs Curve25519.” Information Security Stack Exchange, 10 May 2023, https://security.stackexchange.com/q/50878. ↩︎
Earlier I said I was using the
EdDSAkey algorithm, but above you’ll see the key is created ased25519. I believe these are the same thing.Nakov, Svetlin. “EDDSA and ED25519.” Contributors Milen Stefanov and Marina Shideroff, EdDSA and Ed25519 - Practical Cryptography for Developers, 23 Nov. 2018, https://cryptobook.nakov.com/digital-signatures/eddsa-and-ed25519. ↩︎